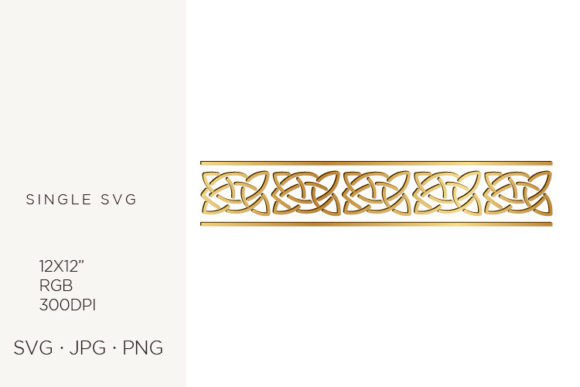
Unlocking the Potential of a Simple Celtic Border for Professional and Personal Projects
The allure of Celtic design lies in its timeless complexity and deep historical roots, yet integrating these intricate patterns into modern projects often feels daunting. A Simple Celtic Border offers the perfect solution, bridging the gap between traditional artistry and contemporary utility. Whether you are a small business owner crafting unique branding, a hobbyist making handmade cards, or a web designer seeking elegant page dividers, this digital asset provides immediate value. However, many creators overlook critical technical details when selecting and applying these graphics, leading to frustrating results that compromise quality and efficiency. Understanding the nuances of file formats, resolution, and application contexts is essential to transforming a basic download into a professional-grade element.
The Hidden Pitfalls of File Format Selection
One of the most common mistakes creators make is treating all digital image files as interchangeable. When you download a package containing an SVG, JPG, and PNG, it is tempting to grab the first one that opens on your screen. This approach often leads to subpar outcomes, particularly when scaling or printing. For instance, using the JPG file for a logo or a large wall art print can result in pixelation and unsightly compression artifacts. JPGs are raster images, meaning they are made of pixels; once you enlarge them beyond their original dimensions, they lose clarity. If your project requires resizing—such as adapting a border for a business card versus a banner—the JPG will fail to maintain crisp edges.
Conversely, the SVG file included in your zip folder is a vector graphic. Unlike raster images, vectors use mathematical paths to define shapes, allowing them to be scaled infinitely without any loss of quality. A frequent error is ignoring the SVG entirely because the user is unfamiliar with vector software. By sticking only to the PNG or JPG, you limit your project's potential. If you intend to create a logo or a large-scale printed item, the SVG is non-negotiable. It ensures that the intricate loops and knots of the Celtic pattern remain sharp, regardless of whether the final output is two inches or twelve feet wide.
Resolution and Color Mode Misunderstandings
Another area where users often stumble involves resolution and color profiles. The provided assets boast a 300 DPI resolution, which is the gold standard for high-quality printing. However, downloading a 300 DPI image and placing it into a document set to 72 DPI, or stretching it across a canvas larger than its native 12x12 inch artboard, effectively lowers that resolution. Many beginners assume that "high resolution" makes an image immune to distortion, but physics still applies. If you need a border larger than 12 inches for a wall mural, you must use the SVG file, not the 300 DPI PNG or JPG, to avoid blurry prints.
Furthermore, the color palette is specified as RGB. This is ideal for digital screens, web design, and modern home printers. Yet, a significant oversight occurs when creators prepare files for professional offset printing without converting colors. RGB colors can appear vibrant on a monitor but may shift unpredictably when converted to CMYK by a print shop. While the RGB palette in this pack is versatile, those producing hundreds of invitation cards or stationery for a commercial client should verify color proofs before the full run. Ignoring this step can lead to muted greens or off-black borders that detract from the elegance of the Celtic design.
Maximizing Versatility Across Different Mediums
The true power of a Simple Celtic Border lies in its adaptability, yet many users restrict its use to a single medium. Because the zip file includes a PNG file with a transparent background, it is perfectly suited for layering over photos, colored paper, or textured web backgrounds. A common mistake is using the JPG version for overlay tasks, which forces a white square background onto your design, requiring tedious manual removal in editing software. Always default to the transparent PNG for digital compositing or when printing on non-white materials to ensure a seamless blend.
Consider the range of applications available to you. For handmade craft items and invitations cards, the 12x12 inch artboard size aligns perfectly with standard scrapbooking paper and cardstock. You can print these directly at home or at a local shop. For graphic and web design, the SVG allows you to animate the border or change its stroke color via CSS, adding interactivity to a website that static images cannot achieve. Entrepreneurs creating announcements or party decor should realize that the same file can serve as a watermark on photos, a frame for social media posts, or a physical cut-out for decoration, provided the correct file format is chosen for each specific task.
Practical Steps for Flawless Implementation
To ensure you get the best results from your digital graphics elements, adopt a workflow that prioritizes the right tool for the job. Before starting any project, ask yourself three questions: Will this be printed or viewed on a screen? Does it need to be resized significantly? What is the background texture?
- For Print Projects: Always check the physical dimensions. If your design fits within 12x12 inches, the 300 DPI PNG or JPG is sufficient. For anything larger, import the SVG into your design software (like Illustrator, Inkscape, or CorelDRAW) and export it at the required size and resolution.
- For Digital Use: Utilize the SVG for websites to ensure fast loading times and sharpness on retina displays. Use the transparent PNG for social media graphics or video overlays where vector support might be limited.
- For Customization: Remember that the SVG is editable. You can ungroup the elements to change the thickness of the lines, alter the color to match a specific brand identity, or even separate parts of the border to create corner accents rather than a full frame.
Avoid the trap of "good enough." Using a low-resolution screenshot of the border or stretching a small JPG might save five minutes initially, but it costs far more in time later when you have to redo the work due to poor quality. The inclusion of multiple file formats in the zip file is a deliberate choice to give you flexibility; leveraging all of them demonstrates a professional approach to design.
Ultimately, the Simple Celtic Border is more than just a decorative line; it is a foundational element that can elevate the perceived value of your work. Whether you are designing a logo for a new venture, crafting handmade cards for loved ones, or laying out a stationery suite, the quality of your final output depends on how well you understand and utilize the assets provided. By respecting the differences between vector and raster, paying attention to resolution limits, and choosing the appropriate file for your medium, you transform a simple download into a powerful tool for creativity. Take the time to select the right format, and let the enduring beauty of Celtic art enhance your projects with precision and style.